Adding Context Data for Messaging
Capturing Context Data in Messaging SDK
To send Context Data as metadata for Messaging interactions use the following steps as part of implementing the Messaging SDK:
- Provide an object that implements the MessageModifierDelegate interface
a. On function beforeSend you have to reference the Message object
b. You can change the metadata in the Message object and return the Message object - Pass the Delegate to the Messaging SDK via setMessageModifierDelegate()
val msgDelegate = object : MessageModifierDelegate {
override fun beforeSend(p0: ConversationDetails, p1: Message): Message {
p1.metadata = getMessageMetaData()
return p1
}
override fun beforeNotification(p0: String, p1: Message): Message? {
return p1
}
override fun beforeDisplay(p0: ConversationDetails, p1: Message): Message? {
return p1
}
}
AvMessagingSdk.setMessageModifierDelegate(msgDelegate)
Some use cases for Context Data:
- Customer Type - Bronze, Silver, Gold
- Shopping Cart Full - True, False
- Last Page Visited - Home, Shop, About Us
- Last Item Purchased - Phone, Computer, Camera
Using Context Data Rules to Match Attributes in Administration
Now that you are passing Context Data as metadata with Messaging interactions, you are ready to start consuming that Context Data for your Messaging channel and matching it to Attributes so your Messaging interactions can be routed to appropriate Agents.
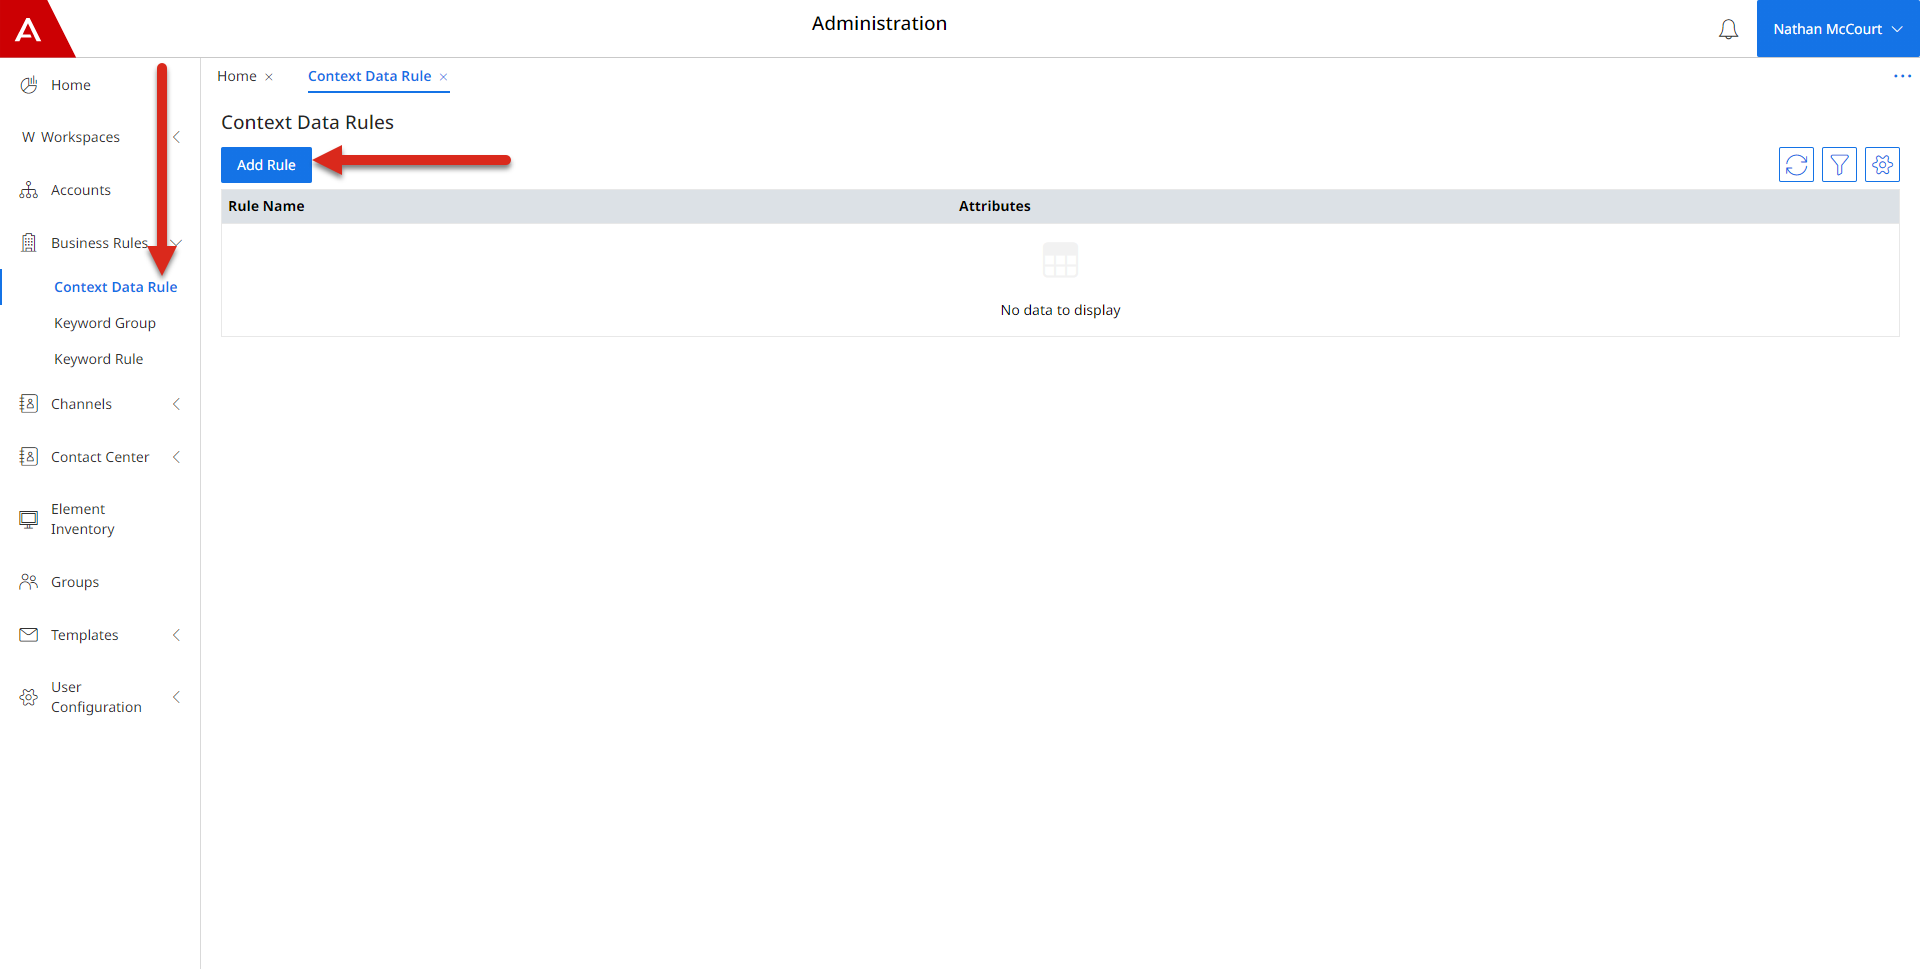
- Navigate to Administration as part of your Avaya Experience Platform™ tenant
- Open the "Business Rules > Context Data Rules" section of the Administration
- Click "Add Rule"
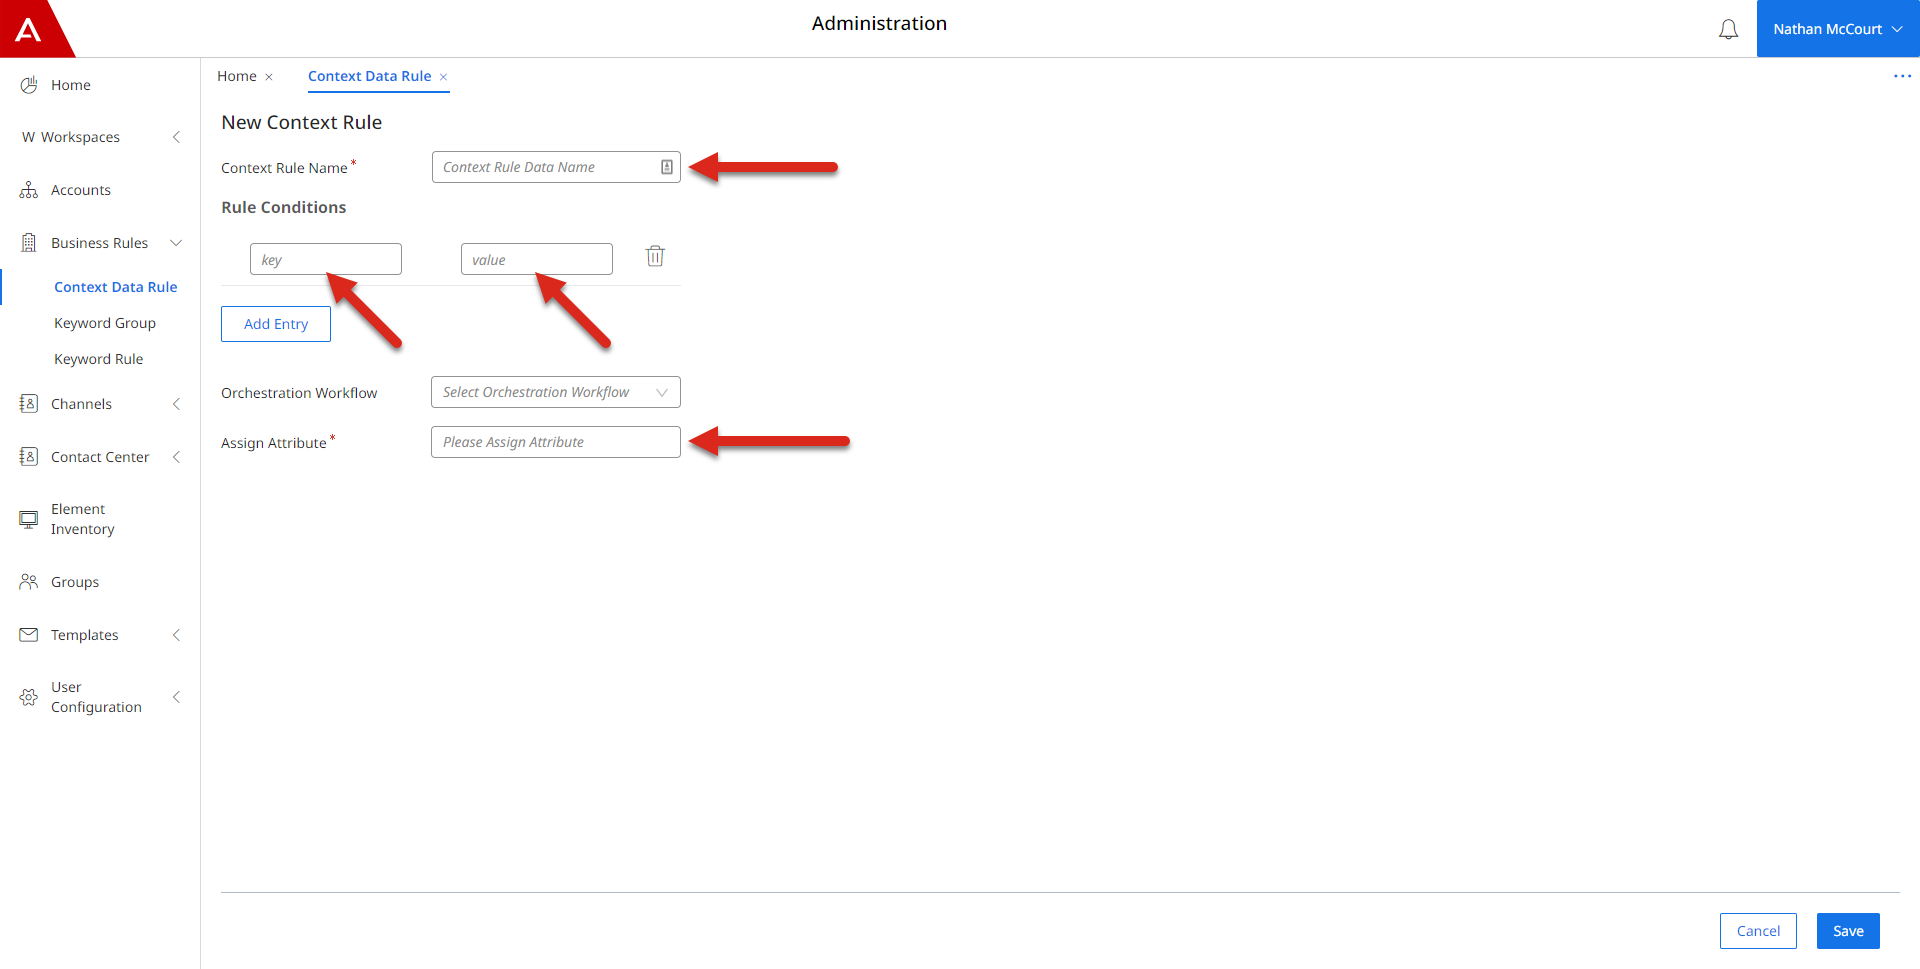
- On the "New Context Rule" page, give the new Context Data Rule a name
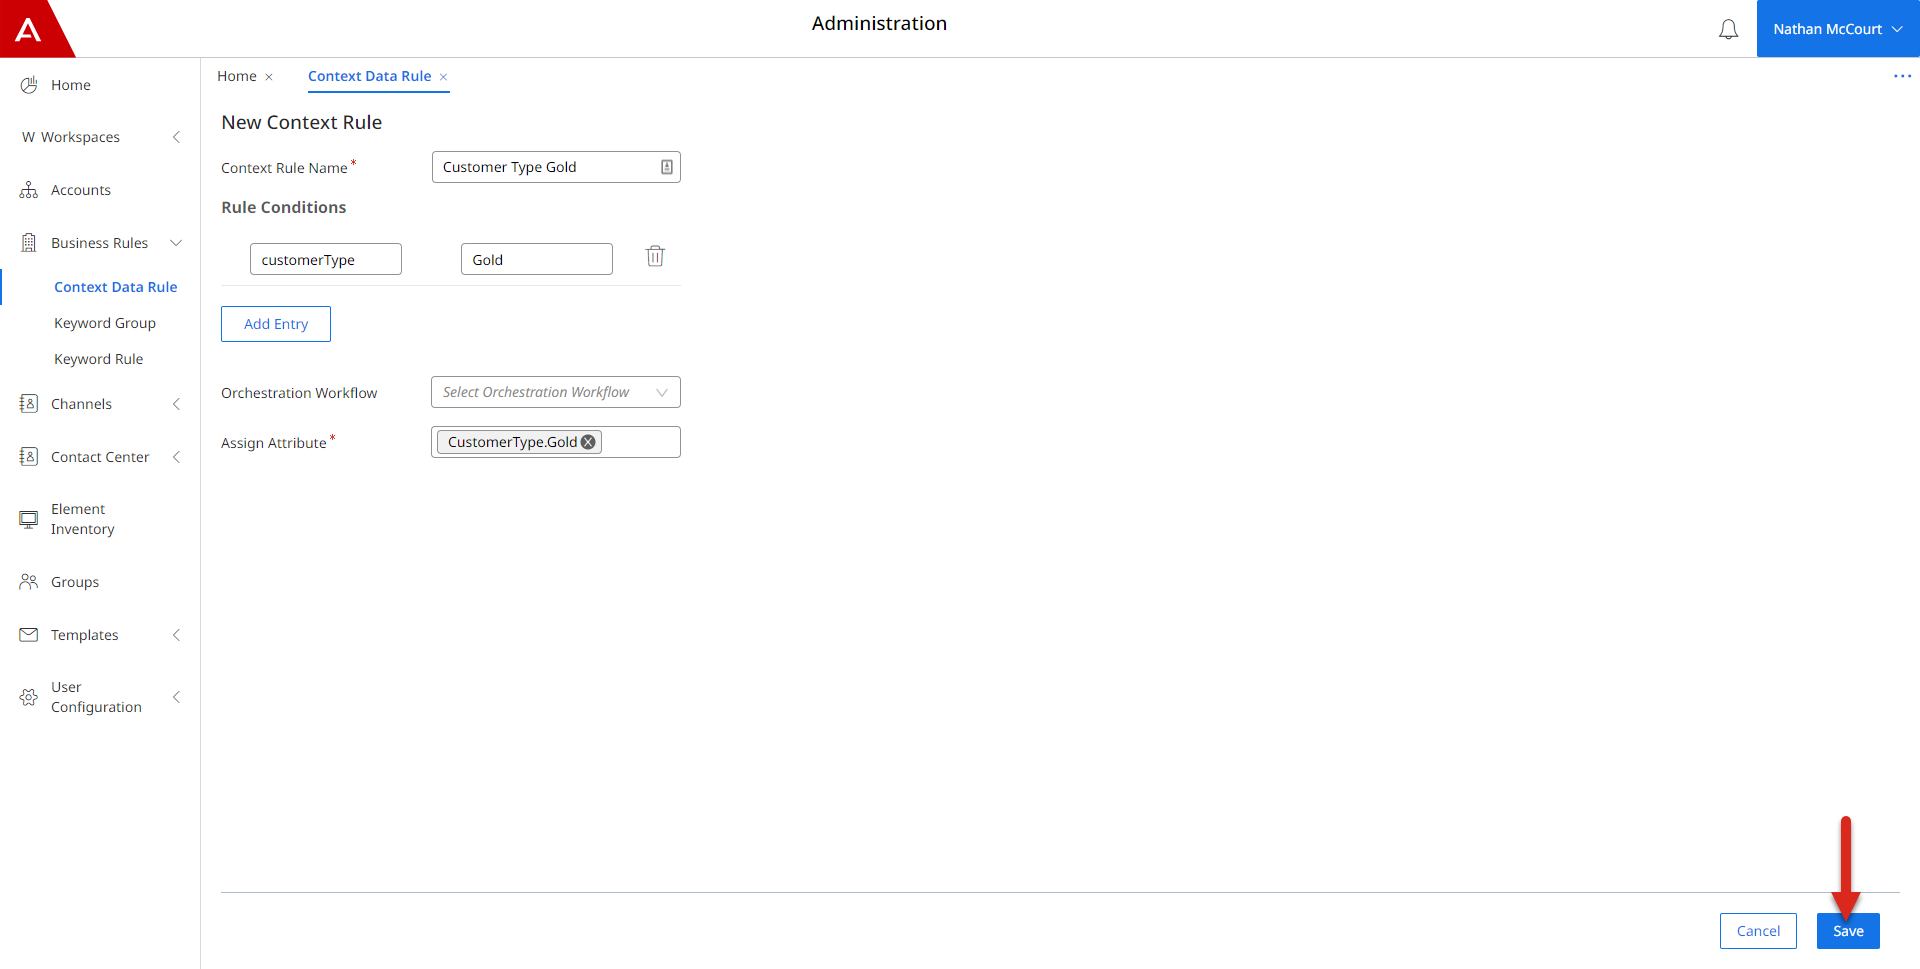
- Give the new Context Data Rule "Rule Conditions" in the form of "key":"value" pairs, making sure the "key" matches the "key" you defined in "Capturing Context Data in Messaging SDK" steps earlier
- Add the Attributes you would like to apply every time the Context Data matches with the Context Data sent with the Messaging interaction
- Once you are happy with all of the information, click "Save"
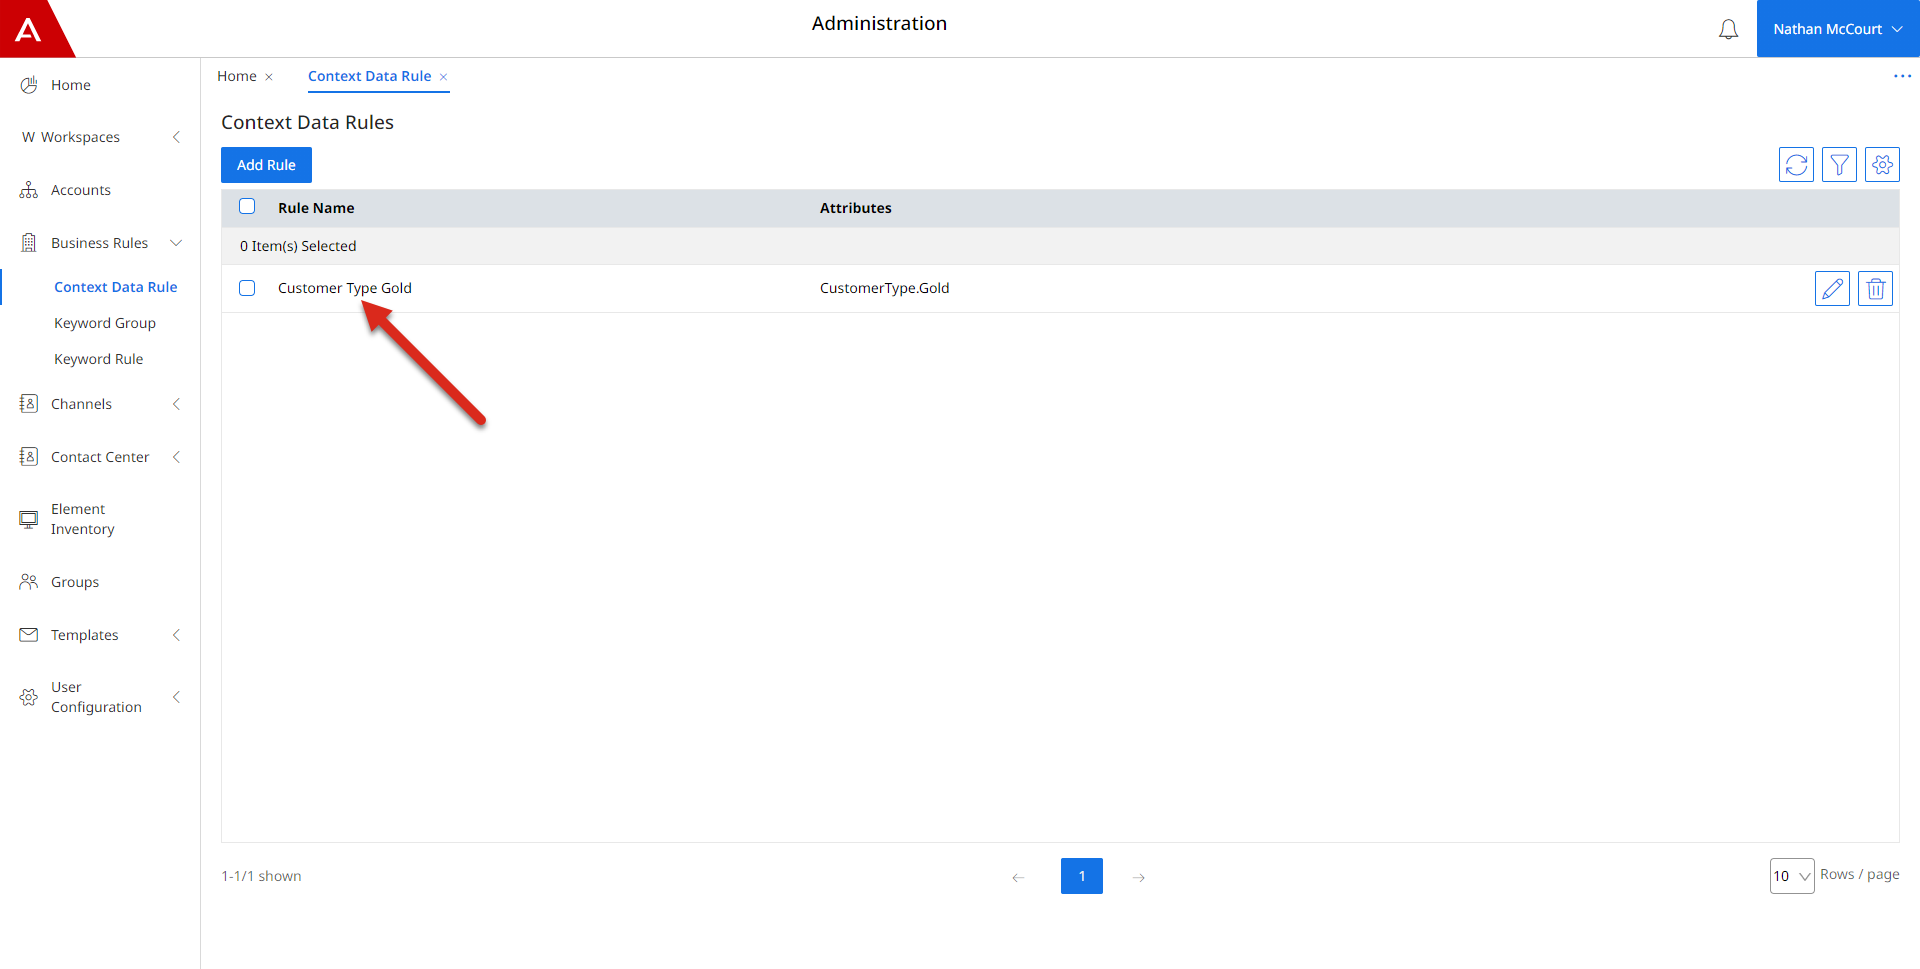
- You should see your new Context Data Rule saved and ready to be used by your Messaging channel
- Navigate to "Channels > Messaging" and open the Pre-Routing Configuration for the channel by clicking the "Cog"
- Once you have opened the Pre-Routing Configuration for the Messaging channel, turn on the "Apply Context Data Matching" toggle to enable Context Data Matching
- Move the Context Data Rule you have created from the left table to the right to enable it as part of the Pre-Routing Configuration
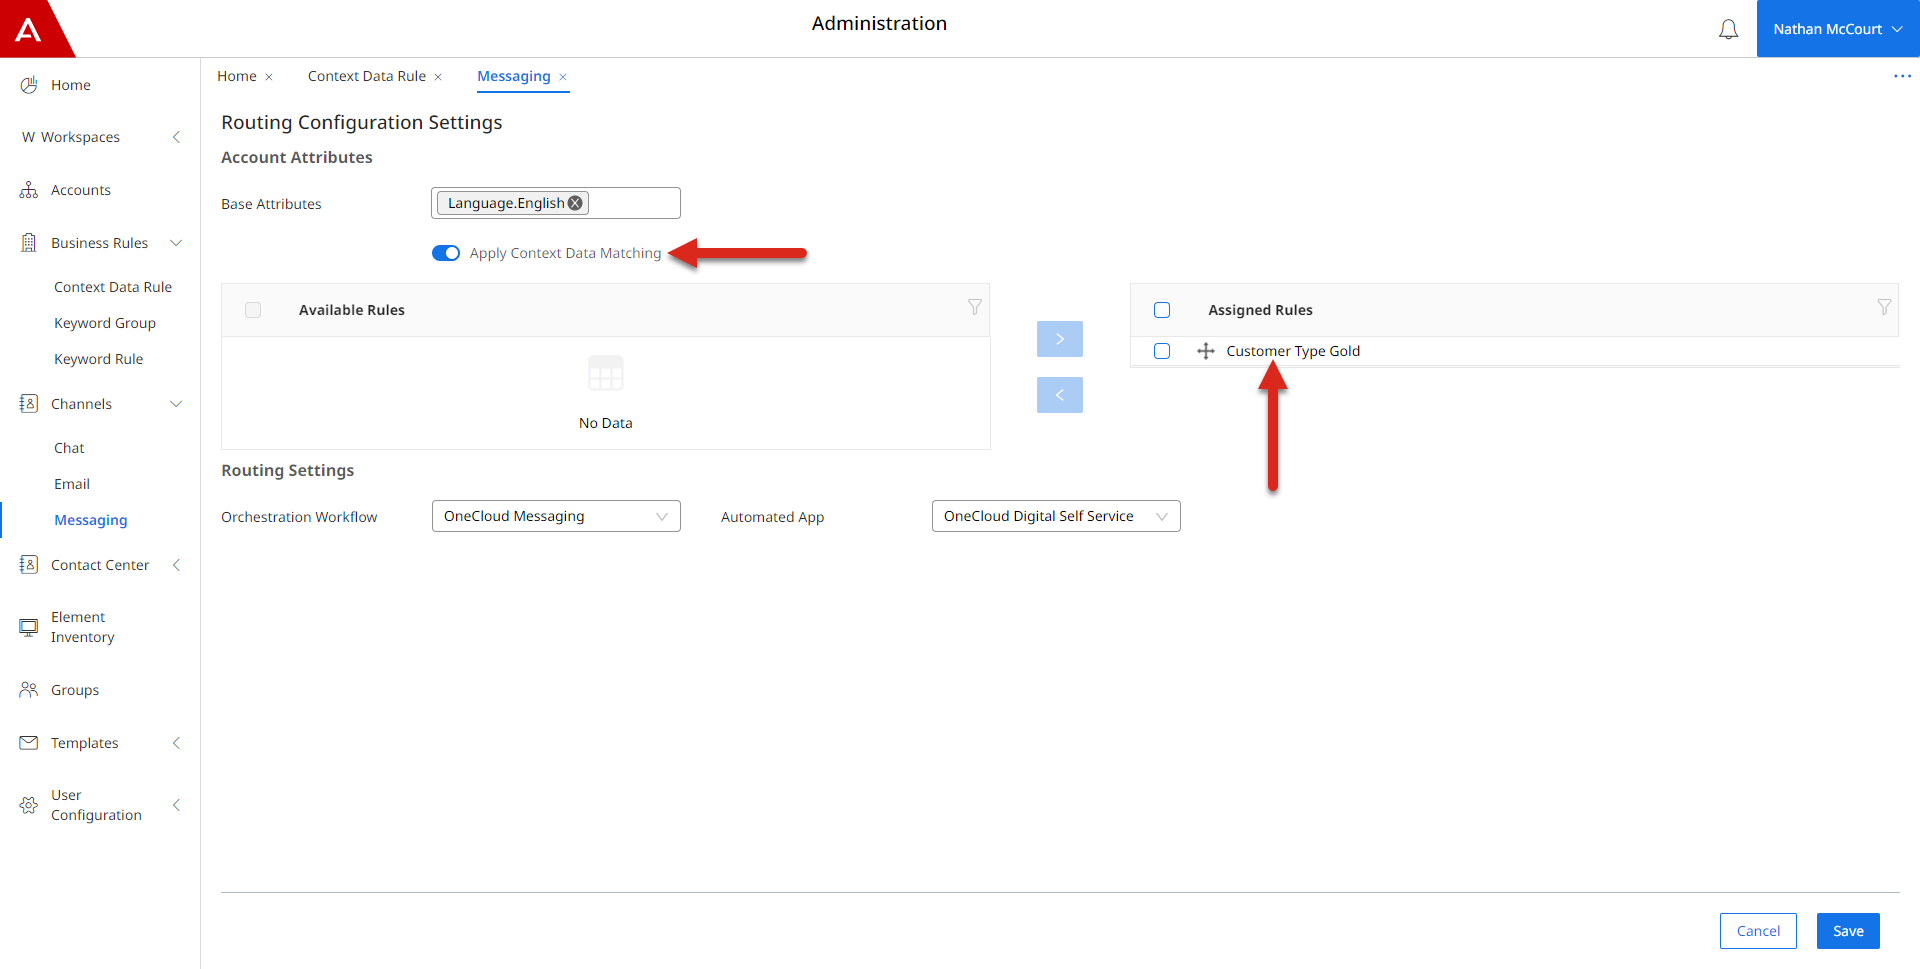
- Once you are happy with the Pre-Routing Configuration, click "Save"
Now there will be a detection of your newly created Context Data Rule when any new Messaging interaction comes to Avaya Experience Platform™.
Updated over 2 years ago